


|

|
|
|
HOW TO BUILD AN EXTERNAL HARD DRIVE I'd been wanting to do this for ages. After my last desktop PC died (motherboard failure) I was so pissed off with the whole expensive / unreliable desktop PC scene that I went and bought a cheap ex-corporate IBM laptop from ebay as my new main PC. This left me with a few left over parts from my old desktop, in particular a large hard drive that was too good to waste. For a small sum I had a 3.5" external hard drive enclosure kit delivered to my door from ebay and an insatiable itch in my screwdriver hand. First you'll need to determine whether the hard drive you want to use is a SATA type or an IDE type. The photo below displays the newer SATA drive on top of the older IDE (sometimes called PATA) type, they're easily identified from one another by the electrical connections on one end. The drive I'm using here is an older IDE one so that was the kind of kit I went for. 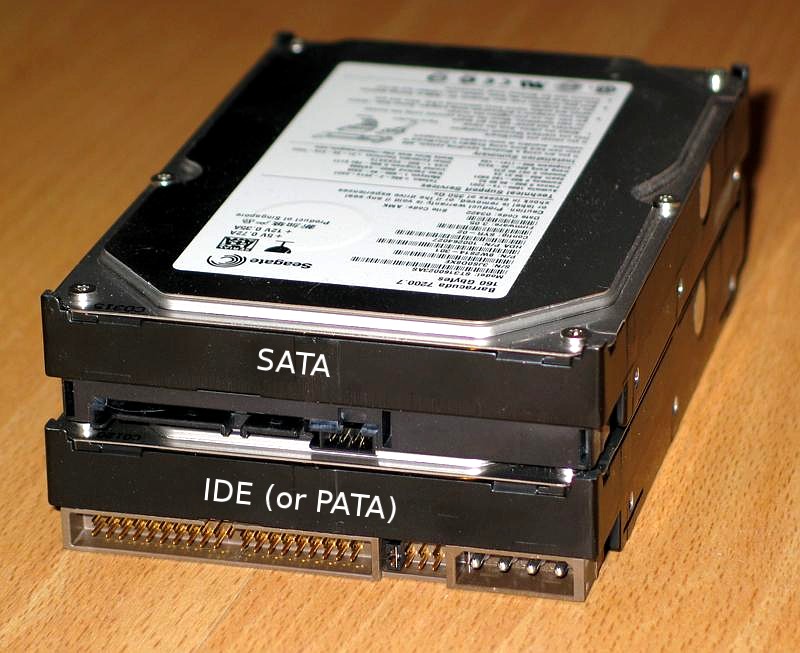
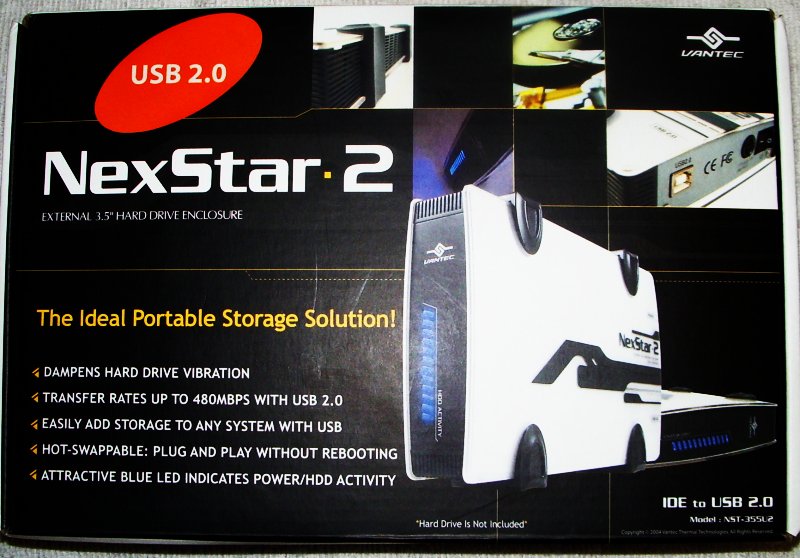
Here's the box as it arrived I liked the idea that this kit had a USB 2.0 interface which means way faster data transfer than plain old USB 1.1. The latest kits are even faster again as they utilize USB 3.0
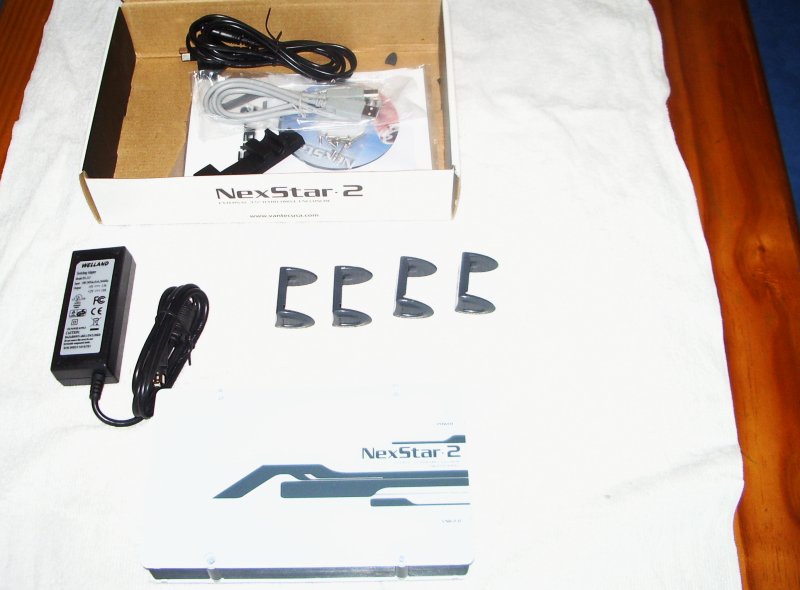
Here's the box half unpacked and you can see the white drive enclosure (looks sexeh!), power leads, USB lead, vibration dampers, enclosure feet and driver disc. Impressive because the kit is cheap and complete. The amount of times I've opened USB kit stuff and there's no USB leads in there.....
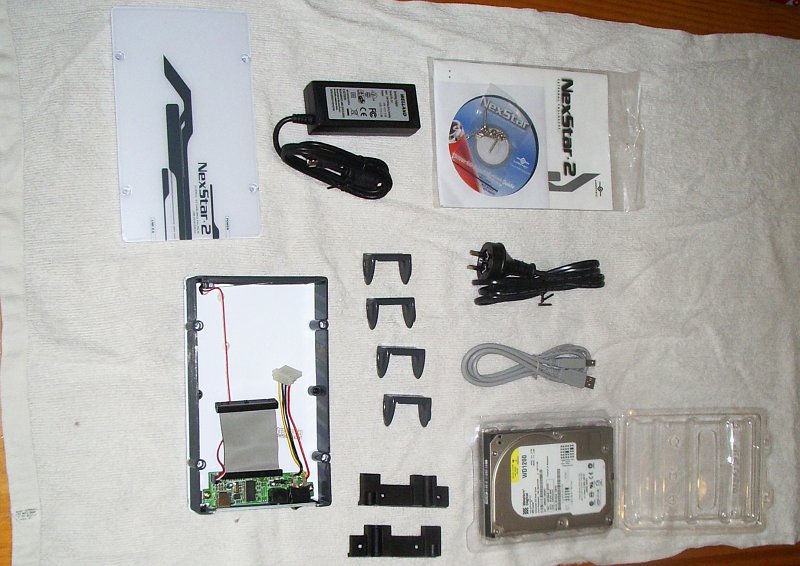
Here's everything laid out on the table. The driver disc will only be needed if you want to hook your external hard drive up to a PC running Windows 98 or Me because they do not have native USB drivers. That's my old Western Digital internal hard drive there on the bottom right of shot.
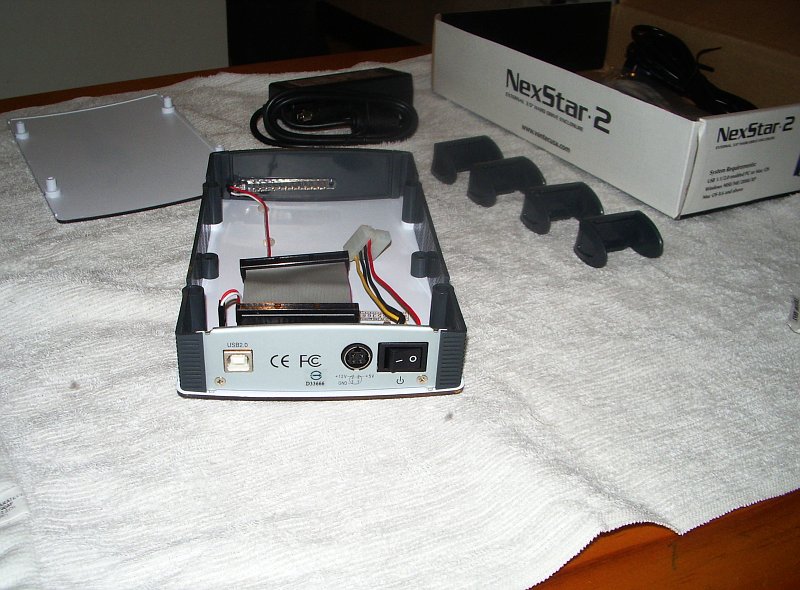
In this picture you can see the guts of the hard drive enclosure and the power switch / USB port on the end of the unit.
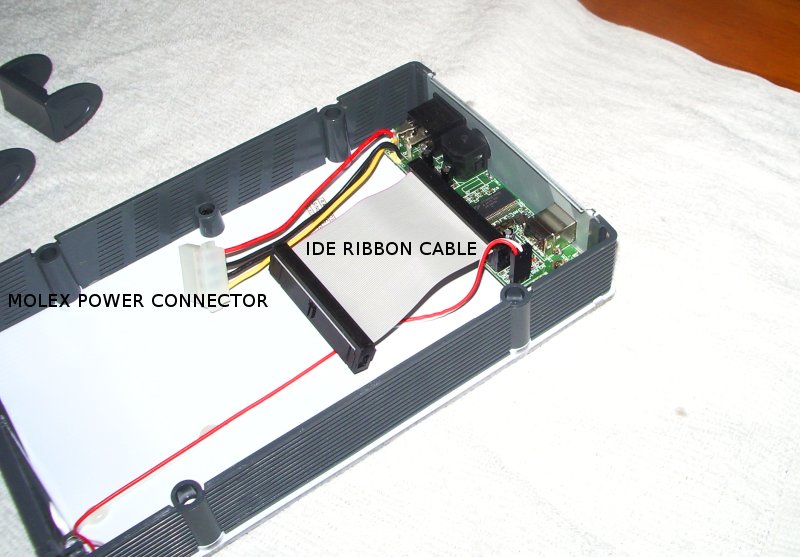
In this shot I've labeled the IDE ribbon cable and the Molex power connector that both have to be plugged into the hard drive. The controlling circuit board is also quite compact indicating elegance in design, nice. Its time to get our hands dirty! A word of warning: De-static yourself before screwing around with delicate electrical equipment. Its as easy as touching the bare metal casing inside any PC (2 screws and your PC side door is off).
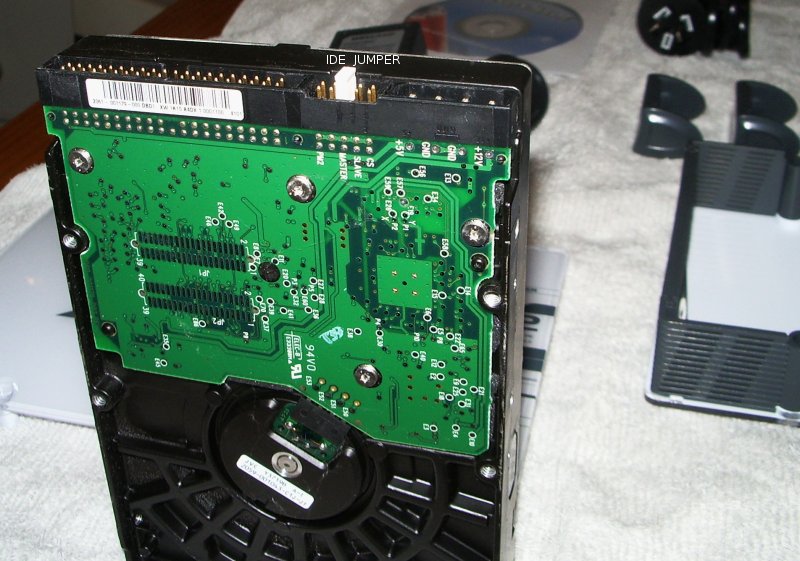
Here's a closeup of my old drive. Look closely at the small white plastic rectangle labeled "IDE Jumper". On every internal 3.5 inch hard drive (as found on every desktop PC) there is a sticker containing jumper position information, allowing the installer to configure the hard drive as either being on the primary or secondary IDE channel and the drive itself as either a master or slave. This kit required the hard drive to be configured as the "Primary Master" and to do this was as simple as looking at the sticker and moving the IDE jumper to cover the correct 2 pins. Piece of piss.
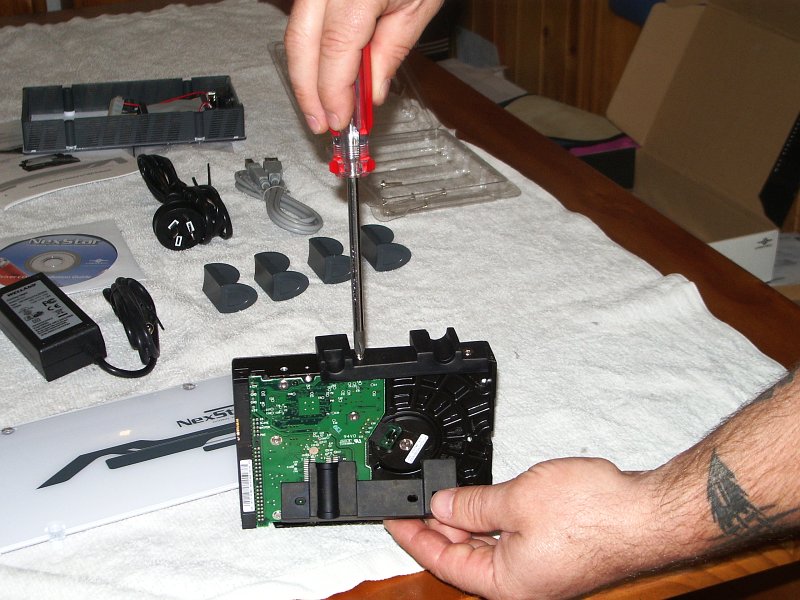
After the jumper was in the correct spot it was time to screw the soft rubber vibration dampers to the sides of the hard drive. These dampers also double as molded mounting points for the inside of the enclosure and they easily screwed into the standard hard drive mounting holes with the supplied screws.
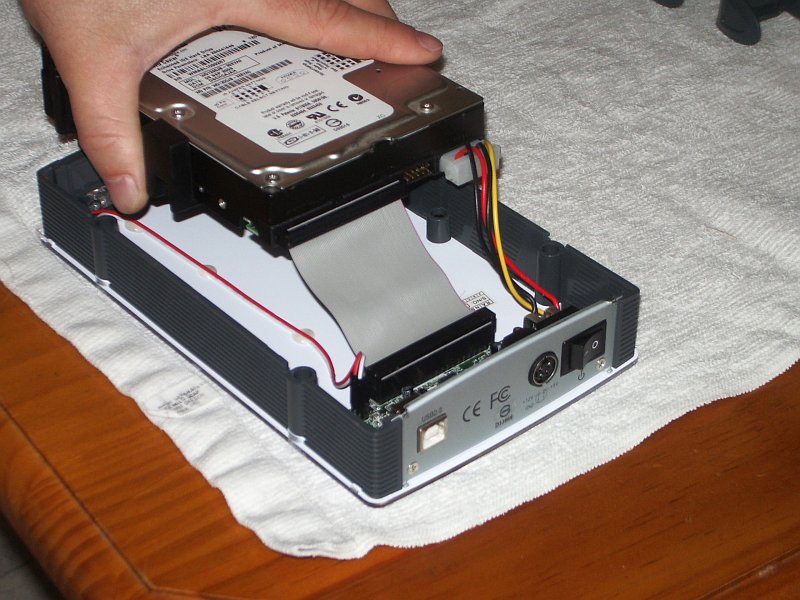
Now its time to plug in the connecting cables. The 4 wire Molex power connector has rounded shoulders on one side so it can only go into the hard drive one way, however they often require a fair amount of force to plug them fully home so don't be scared to push a bit harder. The IDE ribbon cable carries data to and from the hard drive and is easy to plug in. The cable terminator has a small plastic protrusion halfway along its length on one side allowing it to only be plugged in the right way around. Be careful plugging in this baby as there are a shitload of tiny copper pins that are very easy to bend if you get it wrong (if you do bend one, pull an old ballpoint pen apart and use the ink tube to slip over and straighten them). You do not need much force to push this cable head onto the drive.
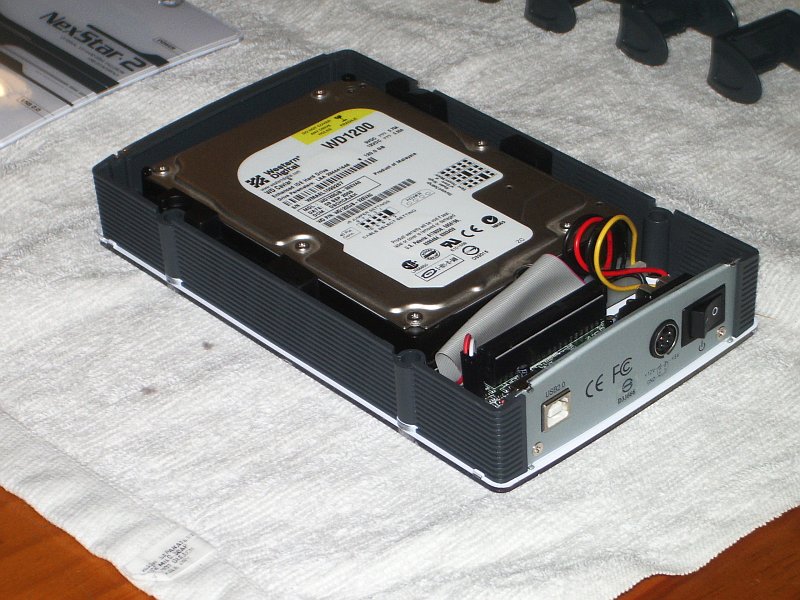
The drive connected and gently coaxed into the enclosure box. Care is needed here to make sure it is seated squarely and the cables are not pinched in the process.
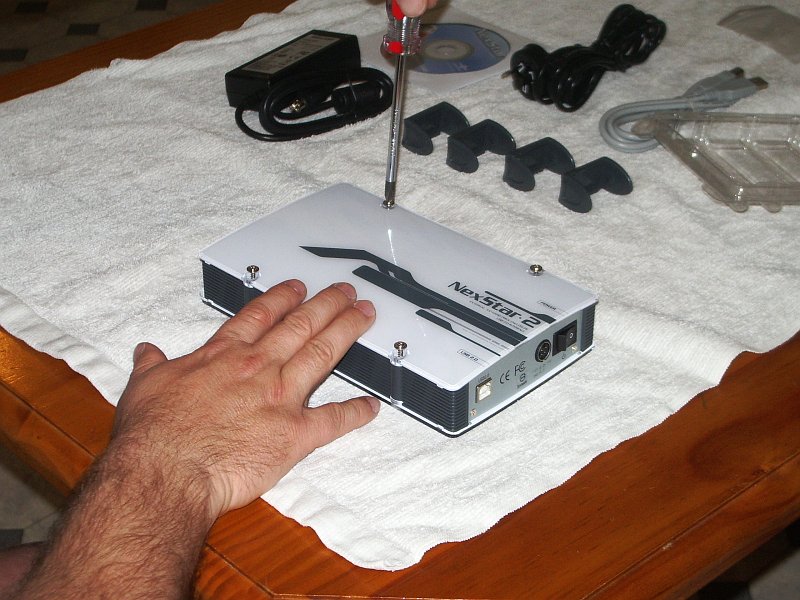
Screwing the enclosure lid back on was stupidly simple, only 4 small screws.
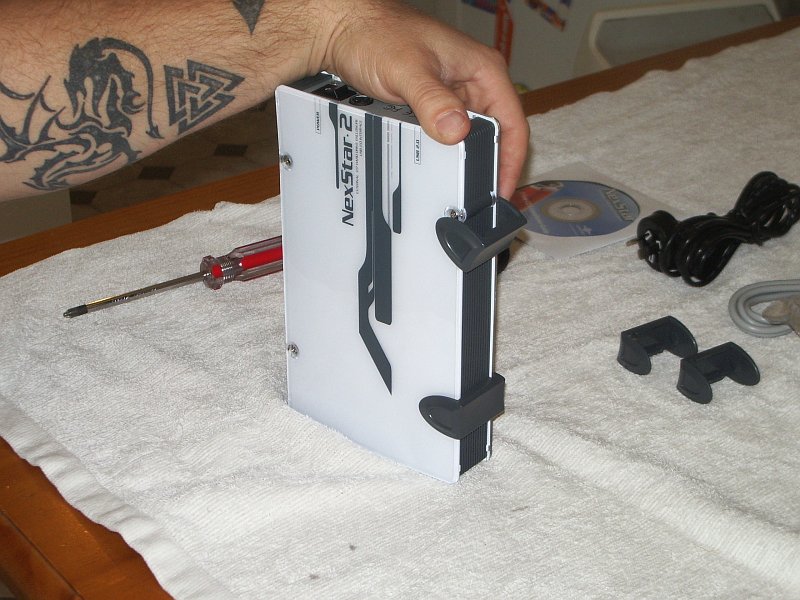
The molded enclosure feet just snap over the screw holes. This is a great idea as it hides the ugly screws and protects the case from scratching.
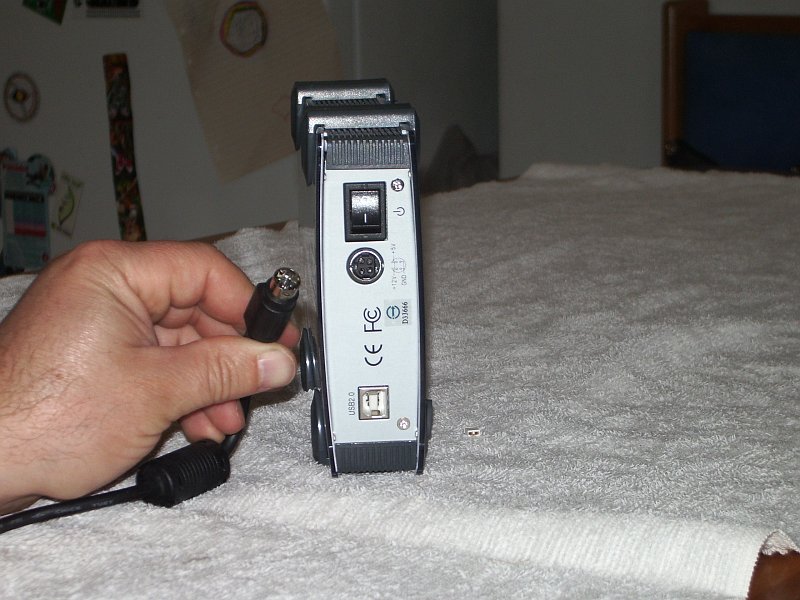
Here we are looking at the unit end on. From the top we have the power switch, the power cable socket and finally the USB 2.0 cable socket. I'm holding the end of the power cable.
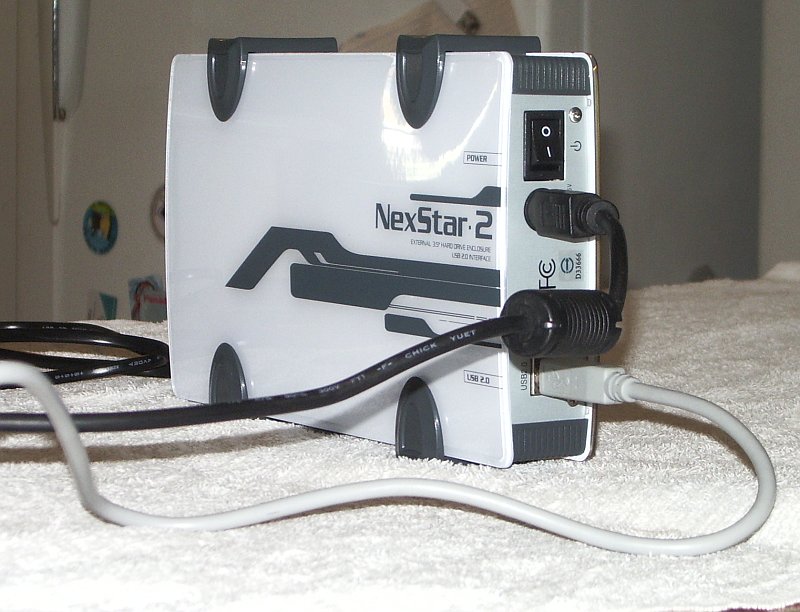
The finished product. Getting the unit recognized by Windows XP (my son's PC) was simple. Just power up the enclosure and plug the bastard into a USB port. Its a cinch!
Oh, I should also mention my Laptop runs Linux (Ubutntu) and it also finds the external drive straight away.
Cheap, easy, huge storage space .... go for it.
So what happens if you want to build a removable drive and you only have a 2.5" laptop drive to use? Easy..... read on.
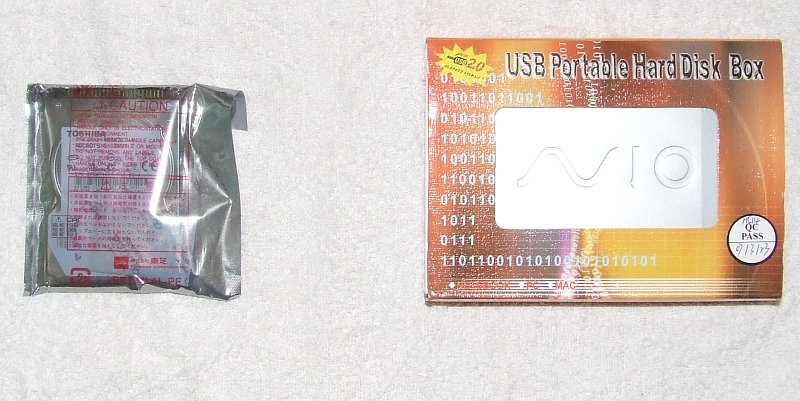
I had an old laptop drive laying around after an upgrade on a mate's Lappy. I bought a cheap external case for it on Ebay and getting it up and running was stupidly easy.
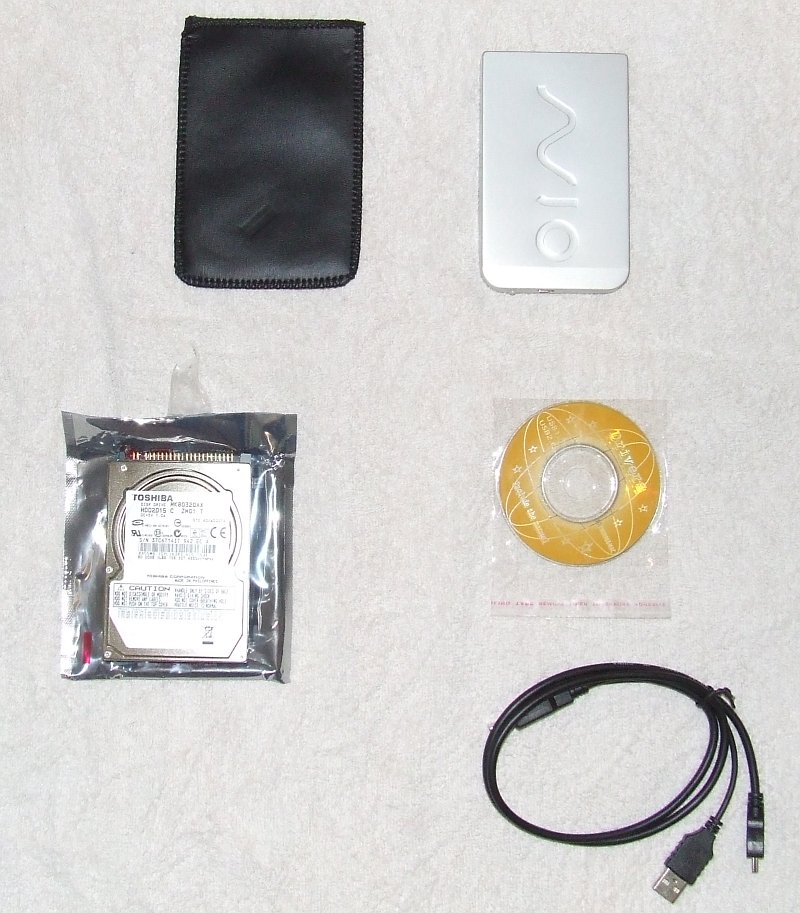
Here is everything that came with the kit and the laptop drive as well (in the anti-static bag). You will only need the driver disk if you are still running Windows 98. Windows XP and Vista will auto connect to the removable drive as will many varieties of Linux.
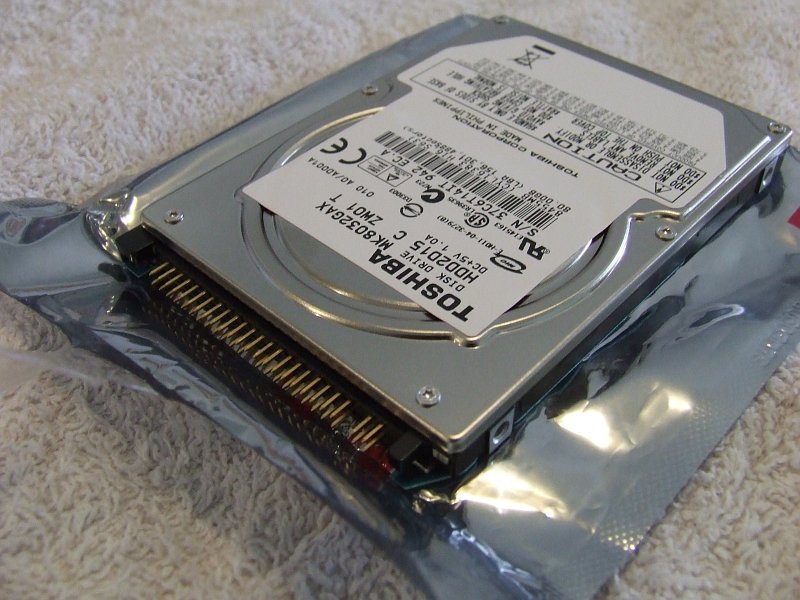
Here is a close-up of the lappy drive out of its protective bag. Be VERY careful not to touch the brass colored pins with your fingers (static electricity kills computer parts).
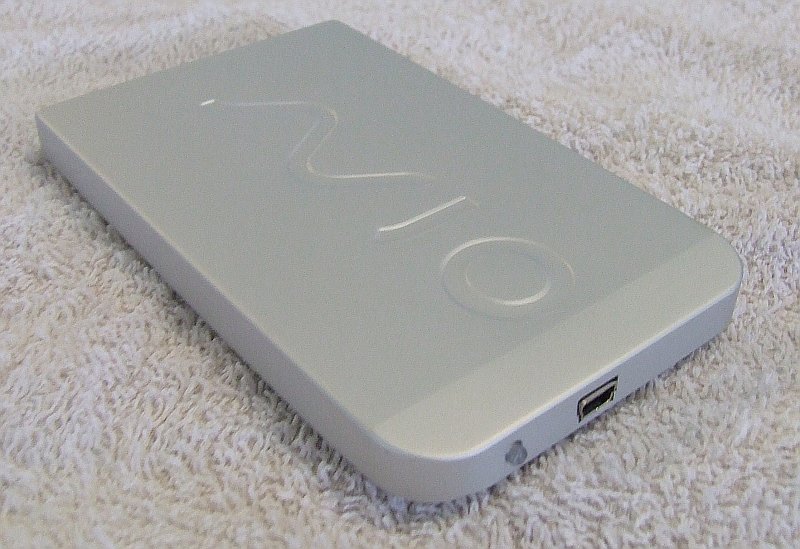
Here is a close-up of the metal removable drive case before I separated the two halves to insert the hard drive. The small plug socket you can see is for the USB cable to plug into. The tiny plastic protrusion you can see is the hard drive activity light (led). This case is USB2.0 compatible which means data transfers are very quick.
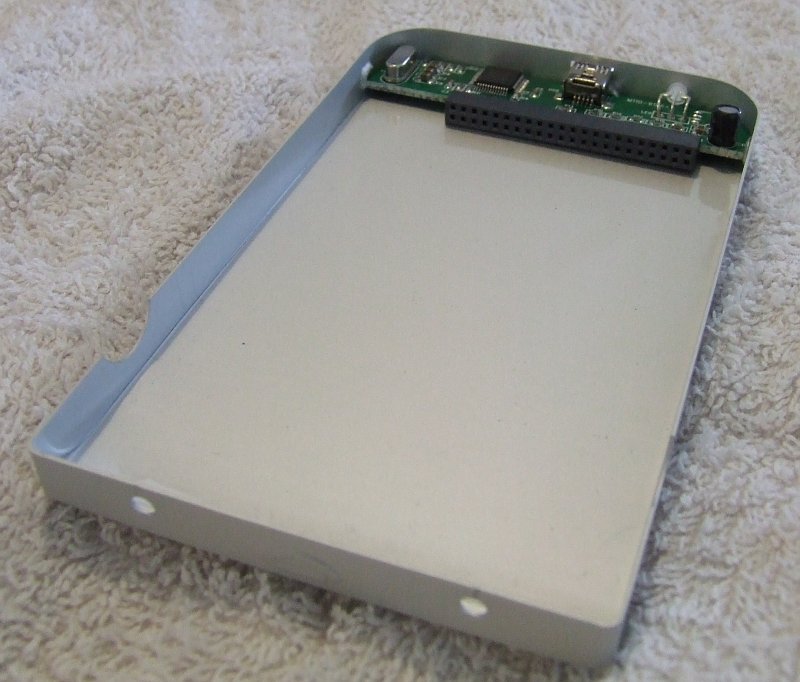
Its hard to believe that there is such a small circuit board inside there huh?
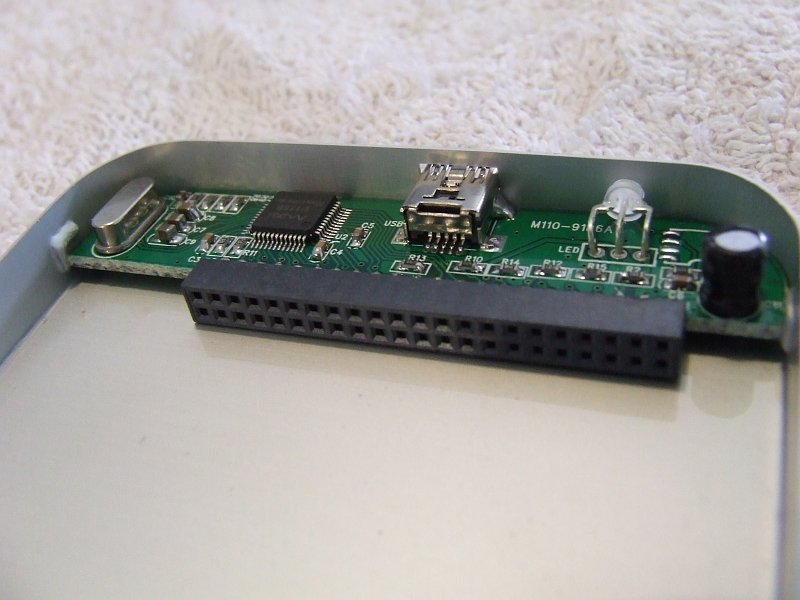
Close-up of the circuit board. That one black chip does a power of work!!
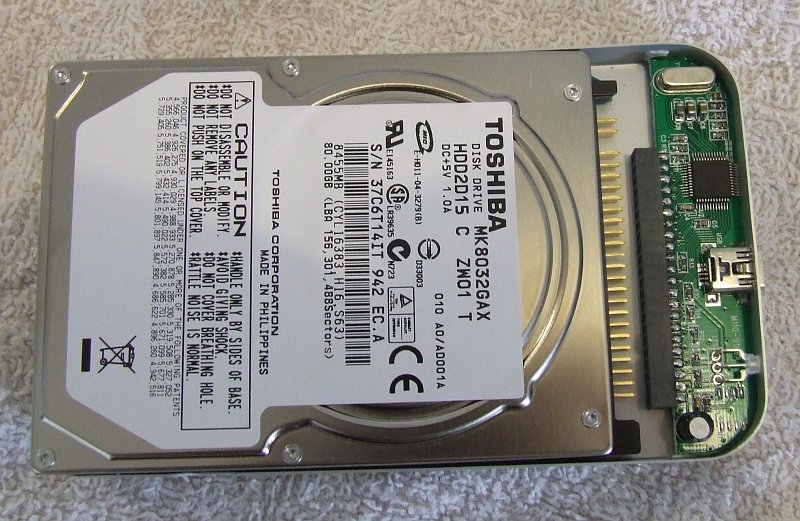
The drive just about ready to slot in. The rear of the Hard drive is resting on the back lip of the case lower while I steadied it to line up the pin array. The front of the drive is down inside the case lower and although it looks tight for room, there was enough sideways play to misalign the pins if you try and rush this step. *** The pins will bend easily so be careful. If you do manage to accidentally bend one don't panic... pull the insides out of a Biro pen and use the plastic tube to slip over the end of the pin and very carefully straighten it out.
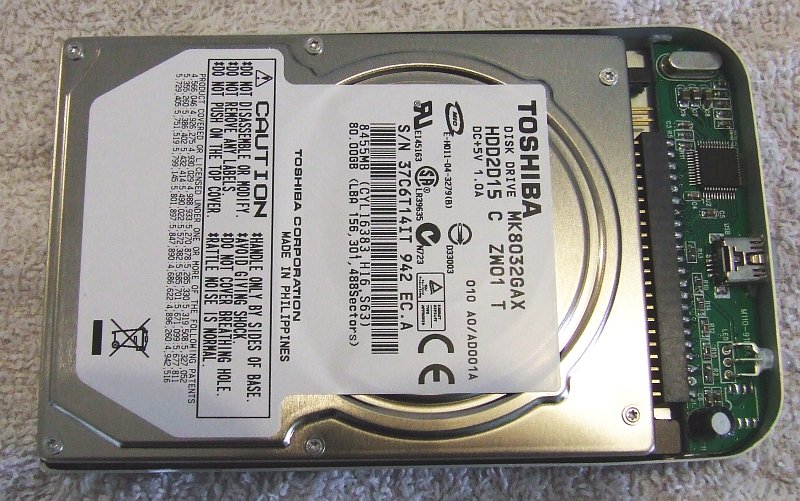
Carefully engage the pin array with the black socket and snug the drive home so the pins fully disappear inside the plastic casing.
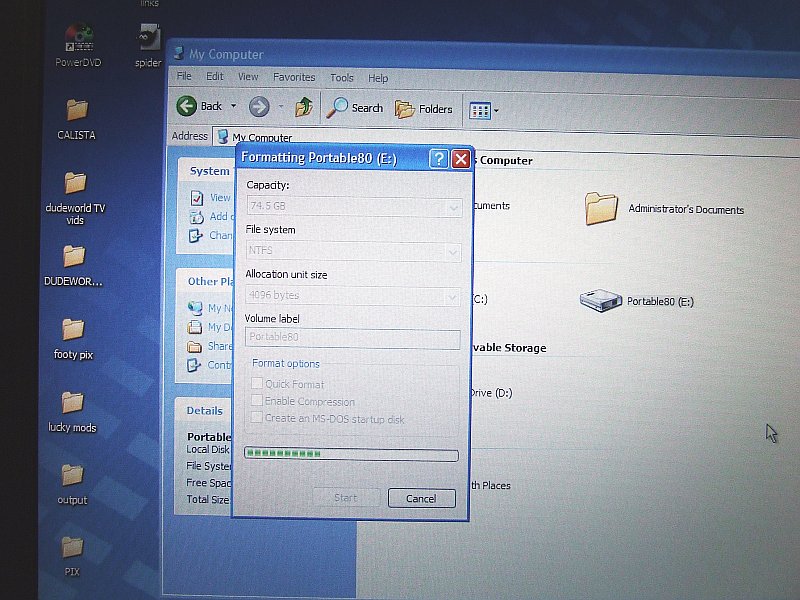
Reassembly is really easy. Cheap cases like this one have a sprung tab retention system and the case upper just snaps into place over the lower. Connect your USB cable to your drive and then your PC making sure to use BOTH of the PC end sockets. One socket carries data and power and the other socket supplies extra power for the Hard drive. A common mistake is to only use one socket on the computer end, resulting in bad connectivity and poor performance. In the pic above my desktop PC (win XP) instantly recognized the removable drive, loaded the appropriate drivers and allowed access. The first thing I did was to format the drive to wipe out any old residual data and provide fresh, reliable performance for the life of the drive. Since penning this article, I've build many removable drives this way and had them recognised by Windows 7 and 8 no problem. This drive will primarily be used with Windows XP and Vista PC's so the NTFS file system was chosen to format it with. NTFS is more reliable than the old FAT file system but be warned... it is not compatible with Win 95, Win 98, Win ME. The latest versions of linux now incorporate NTFS support making it a viable option for those platforms. I'll also add you might like to invest in a decent small screwdriver set for this task. Although the enclosure kits often include a screwdriver, they are extremely nasty and not a patch on a real tool from a reputable manufacturer. |

Enjoy this article ? The site ? Would you buy me a beer for my efforts?


|

|

|