




|

|

|
The OEM Constant Velocity Carburettor introduced by Harley Davidson on its Sportsters (1989) and Big Twins (1990) is actually a damn good piece of equipment, capable of flowing enough CFM of air to feed modified 90+ HP motors while giving nothing away to aftermarket carbs by S&S and Mikuni. H-D has sold almost two million CV equipped bikes since then and its only the fact that all new Harley models have fuel injection that they've stopped being produced. In stock form they are a decent carburettor, sporting a 40mm throttle bore and a 39mm venturi. In standard trim it was only the early California models that had any problems, with an off-idle hesitation caused by a lean slow-speed jet (to beat emission requirements). The problem was easily cured however by changing the slow jet to a #45.
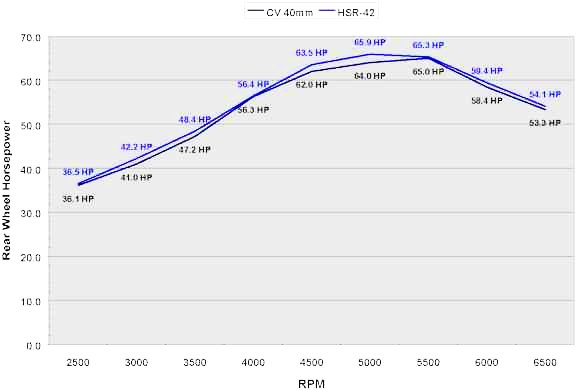
Jerry Branch of Branch Flowmetrics did this dyno testing of a CV carburetor against the Mikuni HSR-42. The engine was a stock 88" Twin Cam with a set of Branch #4 heads installed, while everything else on the bike was stock. The results clearly show that a properly tuned CV carburetor makes excellent power on mildly modified engines. The dyno results of an S&S carburetor are very similar to the Mikuni results. You can see that spending $850 AU on a 42mm Mikuni flatslide results in only a 2hp maximum gain over the stock CV... what do you think happens when you modify the CV for better throttle response ? A 2002 Twin Cam with a stock CV carburetor develops 60 to 63 hp. With a free-flowing air filter, performance mufflers and a larger main jet the Twin Cam motor will easily produce 70 to 75 hp. On a hot-rodded Evo or a Twin-Cam motor (higher compression pistons, performance cam, aftermarket ignition, high flow air filter and mufflers), the standard CV carburetor will become the limiting factor in the engine builders horsepower quest. There is more power lurking inside the CV however and there are several ways to improve its potential; buy a pre-modified carburettor, have yours modified by a reputable performance shop or get down and dirty and modify it yourself. The shops who work a lot with the CV carburetor are boring out the throttle body to 42 mm, installing a larger butterfly, contouring the slide and drilling bleed holes in the butterfly. These carburetors have the highest potential output but most of these operations are beyond the abilities of most blokes out in their garage. The amount of power between a professionally modified carburetor and a re-jetted stock CV carburetor can be as much as 20... The cost is often between $275 and $500 US, depending on how much work is done to the carb.
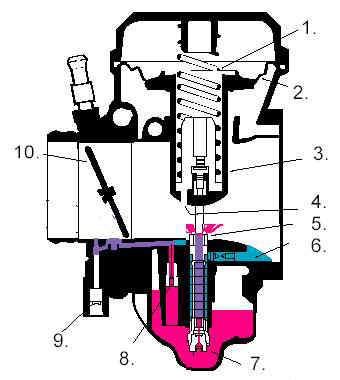
OEM CV Carb Cutaway Diagram 1. Slide Spring 2. Slide Diaphragm 3. Vacuum Slide 4. Vacuum Port 5. Needle Jet 6. Main Air Jet 7. Main Jet 8. Slow Jet 9. Idle Mixture Adjustment Screw 10. Throttle Plate
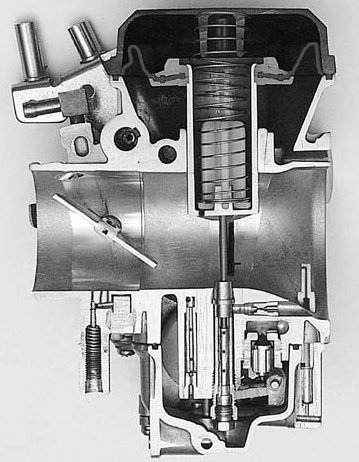
OEM CV Carb Cutaway So lets see what the experts are doing... 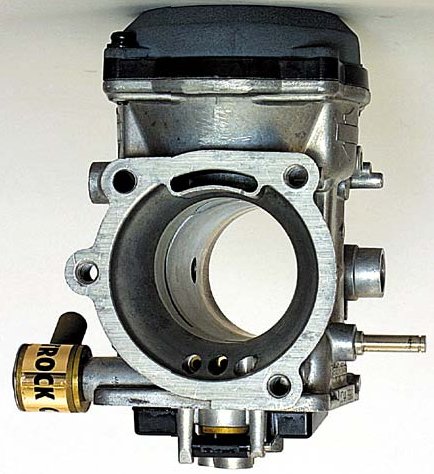
This is a carburettor body only that has been reworked by Trock Cycle in the USA. They've bored out the throat to 42 mm and blended the venturi for a high velocity flow. A new, larger throttle butterfly will be installed before they're finished, as will a new fuel inlet that has a larger capacity and the ability to rotate through 360 degrees.
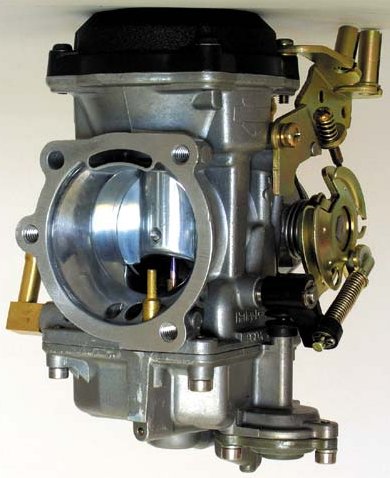
The Dakota Kid (USA) bores the carburetor's throat to 42mm, recontoures the slide and polishes every part that encounters the airflow. Their CV also features a larger fuel inlet and a custom needle jet.
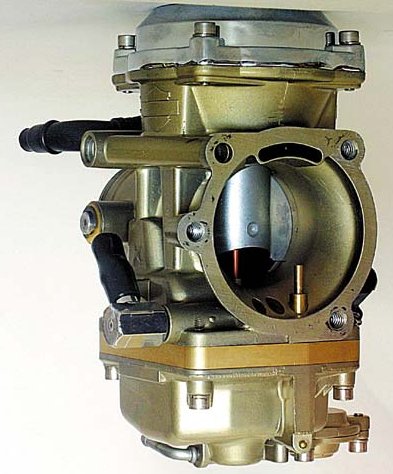
Wood Performance Products (who also make awesome camshafts) installed a spacer between the carburetor body and the float bowl to increase its volume. They bored the body to 42 mm, recontoured the slide and installed a custom fuel inlet with a larger high flow needle and seat.
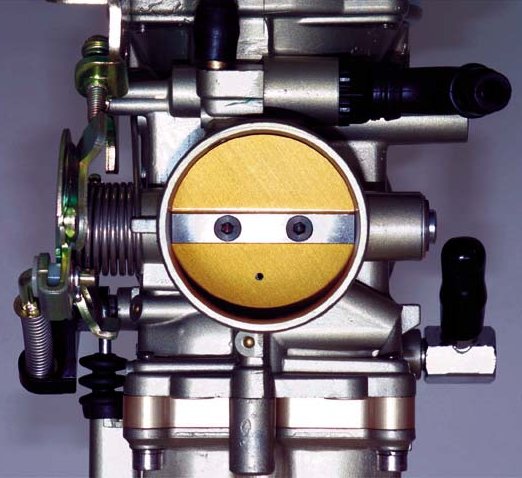
All three modified carburettors had a bleed hole (shown here on the Wood model) drilled in the throttle butterfly. This hole allows the CV to be run on motors that have high-performance camshafts with more valve overlap. These cams require more air past the butterfly at idle than stock cams and tend to stall if they dont get it. If the butterfly is cracked open slightly with the adjustment screw instead of drilling a small hole, the the off-idle transfer ports will be uncovered causing an aggravating idle drama and off idle hesitation problems.
Modifying a CV carburetor requires a steady hand and a lot of patience as installing the kit parts is just the beginning. You must then fine-tune the CV to match your bike's motor and your individual riding style. You'll find that the cost of the kit (about $80 US) and your "blood, sweat and gears" in the shed are well worth the effort. The modified carburetor will not only add more outright power but will make the motor perform better in low to middle rpm ranges where most people ride most of the time.
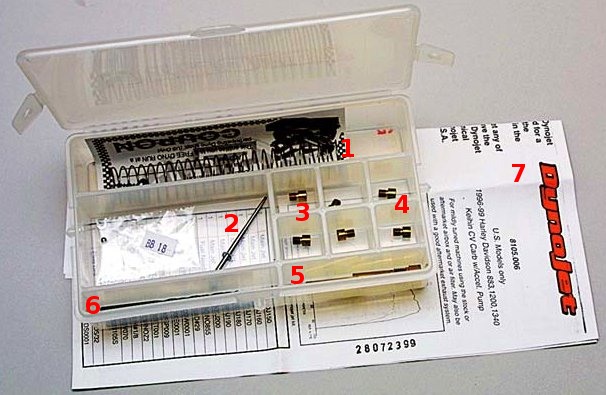
This is the CV carburettor tuner kit from DynoJet and it has all of the parts needed to recalibrate a CV carburetor for performance riding. No special tools are needed, and the instructions have comprehensive tuning tips. I have this kit fitted to my 2005 Twin Cam Softail and throttle response is excellent right through the rev range from idle to redline. KIT PARTS
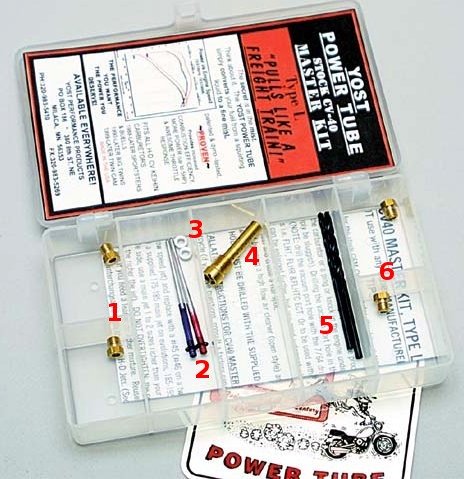
The Yost Power Tube kit features a special dual chamber emulsion tube that atomises the fuel and air mix coming out of the main jet and air bleed into an extremely fine mist. The smaller droplets of fuel make for an air-fuel mixture that burns more completely, doesn't drop out of suspension in the intake manifold (causing a power drop) and has the net result of delivering more power from the same amount of fuel. KIT PARTS
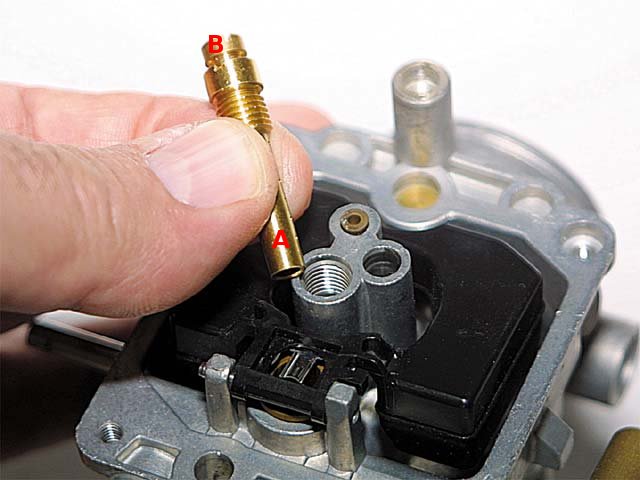
The emulsion tube (A) is threaded into the bottom of the carburetor body. The main jet (B) is screwed into the end of the emulsion tube.
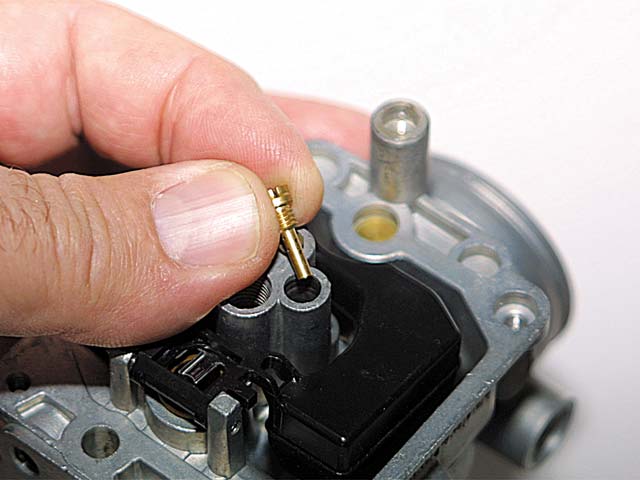
The slow jet is screwed into the carburetor body in the bottom of a hollow well next to the main jet well. This jet controls fuel flow (and therefore fuel mixture) up to 1/4-throttle opening.
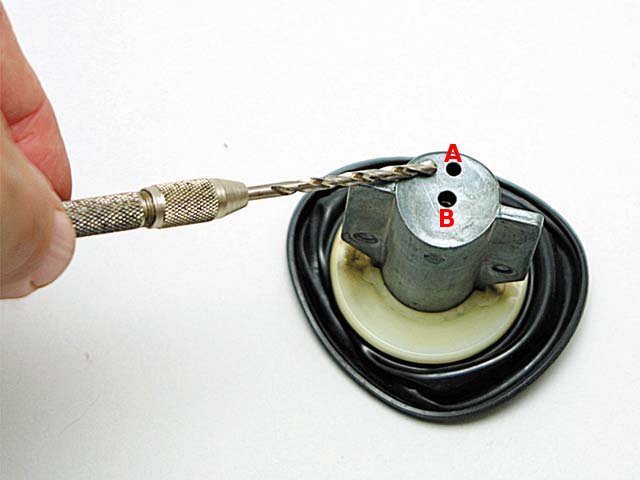
The slide moves up into the carburetor body as vacuum is applied to a hole "A" at the bottom rear of the slide. Enlarging this hole causes the slide to move up faster because vacuum is applied faster to the diaphragm that is attatched to the top of the air slide. Both of the tuning kits included drill bits for this operation. One kit included a #29 bit, the other a 1/8-inch bit. The air slide (and its needle jet) controls both throttle response and fuel mixture in the 1/4 throttle to 7/8th throttle openings. The needle jet is pushed through the hole marked "B" from the underside and is held in place by the air slide spring. The Dynojet kit supplies a replacement air slide spring for faster airslide movement resulting in a crisper throttle response and the needle jet is mixture tunable by moving the circlip to one of the different notches it contains.
|
Enjoy this article ? The site ? Would you buy me a beer for my efforts?


|

|

|